Novoflex VR Slim Panorama Head Review
For years I had been shooting alongside photographers who use panoramic heads. For my style of photography I never really saw the need. I would shoot the odd single-row panorama, but I was totally fine doing so with a standard tripod head.
As more panoramas started creeping into my work, I encountered more issue with panoramas that would not stitch properly. Ridges in the distance would not align or my foregrounds had zig-zag patterns of misalignment running through them.
The Crux with Parallax
I will try to keep the technical jargon to a minimum, but here’s one term we have to look at: Parallax error. Hold up one finger in front of your face, then take turns closing one eye. Your finger will appear to jump around in front of the background since your eyes have slightly different perspectives. The same thing was happening with my panoramas. When I started composing panoramas with more foreground elements, the issue became more pronounced. Without foreground elements the effect is less obvious.

With a standard ball head, my camera was rotating around an axis that did not align with the optical centre of my lenses (a.k.a. the nodal point, the point in the lens where incoming light crosses). As my lens was panning around, it was changing its perspective between shots. This resulted in images that just would not align properly.
The only way to address this issue is to align the nodal point of the lens with the axis of rotation by recessing the camera slightly. Luckily, some problems in photography can be solved by throwing money at them. I finally needed my own tripod antlers.
German Engineering
With zero experience I quizzed a few people on their panorama head preferences. Rob Dickinson in particular had a vast amount of knowledge in this area. He has used most of the common gizmos on the market, from robotic heads for big $$$, to chunky, manual heads. None of these devices seemed to last long in his arsenal. In the end he settled for the Novoflex VR Slim System, and has been using it for a few years now.

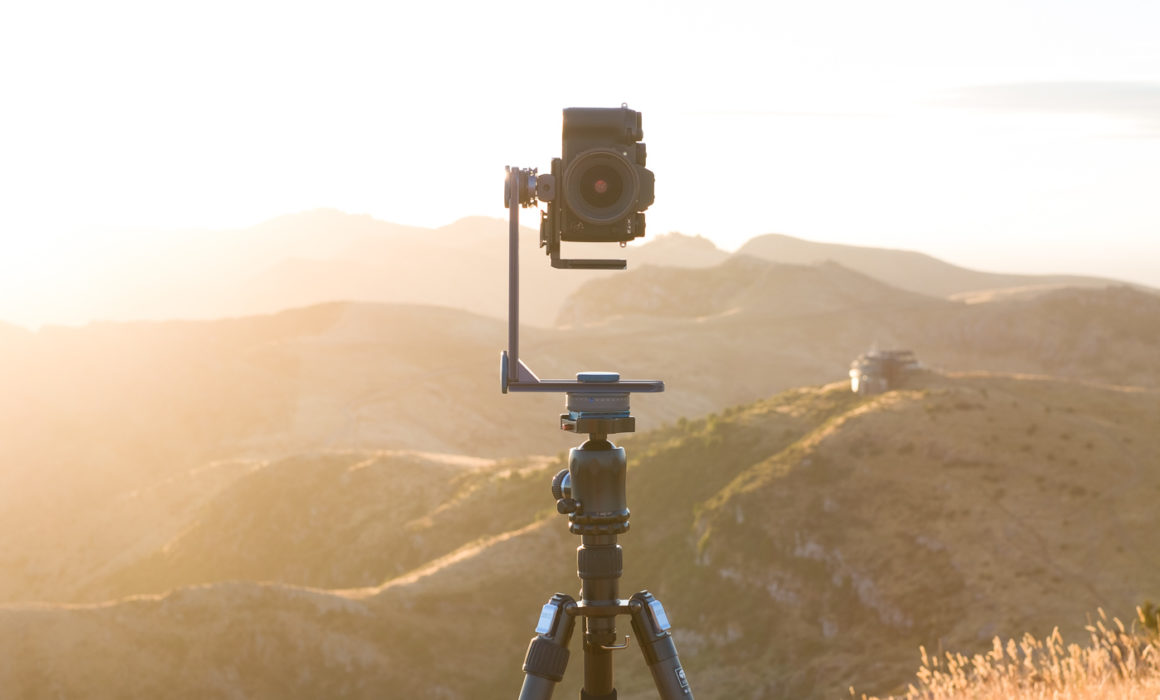
Two rows of 9 images each = 18 images total
Fujifilm X-T2 + XF16, ISO200, 16mm, f13, 1/3s
The specs seemed to fit my needs for a compact, lightweight system that would help me tackle my parallax issues. I had a look at other products on the market, but all of them seemed rather bulky, and designed with much heavier systems than my Fujifilm X gear in mind. So I bit the bullet and ordered the VR Slim System.
As a native German I tend roll my eyes when people get excited about engineering from the homeland. But when I pulled the bracket out of the box, I couldn’t help myself but feel a tingle of excitement. The VR Slim is a beautiful piece of hardware. The finish feels amazing, and it has just the right amount of heft that speaks of quality that will serve you well for a long, long time.
Installation & Calibration
The bracket comes out of the box in its origami state. Putting it together for shooting is pretty self-explanatory. How to find your nodal point, on the other hand, is not quite as simple.

The VR Slim bracket packs down into a little aluminium sculpture (notice the SD card, the internationally recognised measure for all things tiny)
The idea behind panorama brackets is to align the vertical axis that runs through your tripod with the optical centre of your lens: the nodal point. To achieve this alignment, the camera has to be recessed a little until the centre of the lens is right above the rotational axis of the tripod head. Unfortunately, this point is in a different place for every type of lens. To make matters worse, the nodal point will move in zoom lenses.
There are different ways of finding the nodal point of a lens. You can find a few different methods described here and here. The upper horizontal arm of the VR Slim has a ruler built in, which will allow you to measure the amount of recess for each type of lens. I have terrible memory for such things, so I ended up putting a cheerful yellow sticker on the vertical arm. It lists the amount of recess in mm for my three favourite prime lenses and one zoom lens when it is set to a focal length of 12mm. Easy!

Ready to roll
Hint: Don’t forget to centre the bottom horizontal arm over the centre of the lens. You should be able to eyeball the adjustment. If you want to be more precise, use an improvised pendulum.
Once the tedious work of finding nodal points is done, the bracket is ready to shoot. Assembling and taking it apart takes less than a minute. The VR Slim is probably one of the smallest panorama brackets out there when folded down. Which is great, since real estate in my pack is strictly limited.

One row of five images
Fujifilm X-T2 + XF10-24, ISO200, 12mm, f10, 1/200s
Nisi 3-stop soft-grad filter
It would be great if Novoflex could include a $2 neoprene pouch with the bracket. That is less to protect the bracket than to protect everything around it. I cannot overstate how solidly built the bracket is, and I have no doubt that it would eventually scratch other items in my pack.
Shooting
I would not consider myself an advanced panorama shooter, but some additional benefits beyond nodal point correction became obvious to me soon. While single-row panoramas can be corrected for nodal point shooting with a simple slider, multi-row panoramas are much harder to shoot without a panorama bracket.

The VR Slim and a Fujifilm X-T2 are a nice match
The ability to adjust the angle of the upper horizontal arm opens a wide range of options for shooting above and below a level plane. Being high up in the mountains sometimes results in having to shoot below the horizon. Astro photography is the opposite. The subject matter is high in the sky, with little going on in the foreground.

Adjustable click stops, spirit level and cool blue anodizing
Additional features like the distinctive click stops of the panning base make working with reliable overlap a pleasure. The base can be set to 16, 24, 30 or 48 clicks per 360 degrees of rotation. Alternatively, click stops can be disabled altogether.
Having these discrete stops is incredibly useful when shooting in rapidly changing conditions. I find myself being able to blindly rely on the panning base, thus cutting down shooting time for a given composition. At night these clicks stops turn into a must-have. I found managing overlap for astro panoramas hard to impossible in the past. With the VR Slim it’s a breeze to achieve reliable results.

Three rows of six images each = 18 images total
Fujifilm X-T2 = XF16, ISO 6400, 16mm, f2, 15s
Limitations
Which brings me to two things I would like to see improved on the VR Slim system. The panning base is a pleasure to work with. Adjustments of the upper arm to change the vertical angle can be much trickier. A big, blue knob is used to unlock the arm, change its angle, before locking it once again with a few turns of the knob. Temperature changes and working with gloves makes this process less than enjoyable. The shallowness of the knob makes it hard to grip, which is aggravated by temperature drops that can make it harder to loosen. This sometimes requires an amount of force big enough to inadvertently move the tripod, thus ruining alignment of the scene I was working on.

The big blue knob on the left sometimes requires elbow grease to loosen
The way the knob is designed is probably a compromise to keep total system weight and size down. It would still be nice to see some German engineering smarts applied to an easier to adjust quick-release system, or an integrated click-stop system. I would be willing to carry around a few more grams for the added comfort. Some of the bigger models already have this feature. I would greatly appreciate a hybrid model that carries this one key feature over from its bigger brothers.

Awkward to adjust for those of us with opposable thumbs
Additionally, the adjustments knob that holds the quick release plate of the camera is not very comfortable for L brackets or any kind of QR plate that can only be attached front and back, rather than left and right. Since it aligns with the upper horizontal arm, there is no way to grab it comfortably. The easiest way to tension it is to roll your thumb across it with pressure and hope for the best. So far it has never failed me.
Other Benefits
Coming back to the benefits, I like how the system allows me to easily level my panning base. A standard tripod with ball head can be cumbersome to level by adjusting individual legs. If you have ever tried doing this, you know how nerve-wracking it can be to get it level. Using the VR Slim completely negates this inconvenience. Just put up the tripod so it doesn’t fall over, then slide the bracket into your existing Arca-Swiss style clamp. Simply use the spirit level built into the panning base to level the bracket by adjusting the ball head. It is really incredibly easy.
Conclusion
Overall I had a lot of fun with my Novoflex VR Slim panorama bracket over the last half year. It has allowed me to extend my panorama game from slighly wonky single row panoramas to effortlessly merging multi-row panoramas at day and night. Recently, I even started using it for my commercial architectural work, which allows me to shoot compositions that were previously impossible.
The build quality of the system is amazing. I love well designed and built hardware, and the joy when holding this little gem of engineering is close to holding one of Apple’s i-devices. Novoflex includes a ton of tools, little adapters, an Arca style QR plate, and a hot shoe spirit level. It would be nice if a neoprene baggy was included at this price point, but it’s easy enough to find a pouch on ebay for a handful of dollars.

Two rows of 9 images each, 2 bracketed shots = 36 images total
Fujifilm X-T2 + XF16, ISO200, 16mm, f11, 1/20s+1/80s
Those who prefer an easier way to adjust the bracket’s vertical angle should have a look at the Novoflex VR System Pro II. It is a slightly heavier but more feature-rich bracket that allows easier vertical adjustments.
When considering the VR Slim system, keep in mind that it was designed with mirrorless systems in mind. Rob regularly uses this system with his Sony A7RII or Canon 5D Mark IV, including a range of Canon lenses. He pointed out that some of his heavier lenses are not a good fit. I noticed the same with my Fujifilm XF50-140 lens. In windless conditions it just about works, but the VR Slim system was clearly meant to be used with lighter kit.
Apart from some minor niggles I’m in love! The VR Slim system has become essential to my landscape and architecture toolbox. These days I really go nowhere without it.
Resources
If you are after a more technical review, have a look at SCV Photo Ideas’ article.
If you want to learn more about image stitching, check out my recent article.
The VR Slim system on Novoflex’ website